Serves 4
HOW TO MAKE IT HAPPEN...
One thing to understand about pasta is that every Italian has their recipe that works for them - and the real 'secret' is not just in using the best, freshest ingredients, but what happens once you mix it...
For this recipe we thank our free spirited Paula who, when she's not being a tax accountant, cooks (LOTS and often for many people), gives cookery lessons (a couple of times a year), is well within striking age to qualify as a 'nonna' and - wait for it - she's a real Italian, living in Italy!
Rule #1: Nothing must be cold - not even your mixing bowl. Most pasta failures come from too cold and too hasty - calm, determined and in control - pasta responds to that!
Paula works straight onto a warm wooden table that had been standing in the sun most of the morning (but is now in the shade). If your kitchen surfaces are granite (or cold), put a bread board on the surface under your bowl.
Put the flour in the bowl, make a well in the middle.
In the smaller bowl, beat together the eggs, the water and the oil.
Pour the liquid into the well and stir the well, working in the flour from the side until it is all incorporated.
Now it is possibly not very smooth and not beautiful at all. If it looks too dry, work in a little more water, literally a teaspoon at a time. If it looks a little wet - just let it have its first rest (don't add flour yet). Cover the dish and set is aside for 10-15 minutes - why? The flour needs a little time to absorb the liquid.
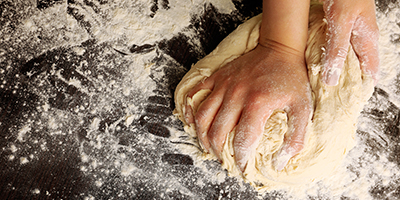
Turn the dough onto a lightly floured board. If it is still too wet (it sticks to everything), work in a little more flour as you knead. The dough should be soft and elastic, like the softest part of your earlobe.
NOTE: Dough for hand-cut pasta is softer than the dough one makes for a pasta machine. It also has a more pillowy 'bite'...
Now gently, but firmly knead the ball - every 5 or 10 kneads, give it a gentle stretch (stretch it until it starts to crack), fold it over and knead and stretch in the other direction.
Why does no one ever tell anyone about the stretching? It is the stretch that really develops the gluten (what you want) - most nonnas do it and it cuts your kneads in half!
4-6 repeats should be enough, but if its not, repeat another once or twice.
Now it is time for the real rest - the jury is out on this one - some people say at least an hour; we mostly allow about half an hour, but to be fair, it all depends on the 'feel' of the dough on the day. If it is a warm day and you're working with super-fresh, moist flour, half an hour is more than enough. On cold days, allow a little longer.
Return the dough to the bowl, cover it, and let it stand in a warmish place for 30-60 minutes. Pro-Tip: if it is a hot, dry day, damp you hands and just run them over the top of the dough ball before cover the bowl.
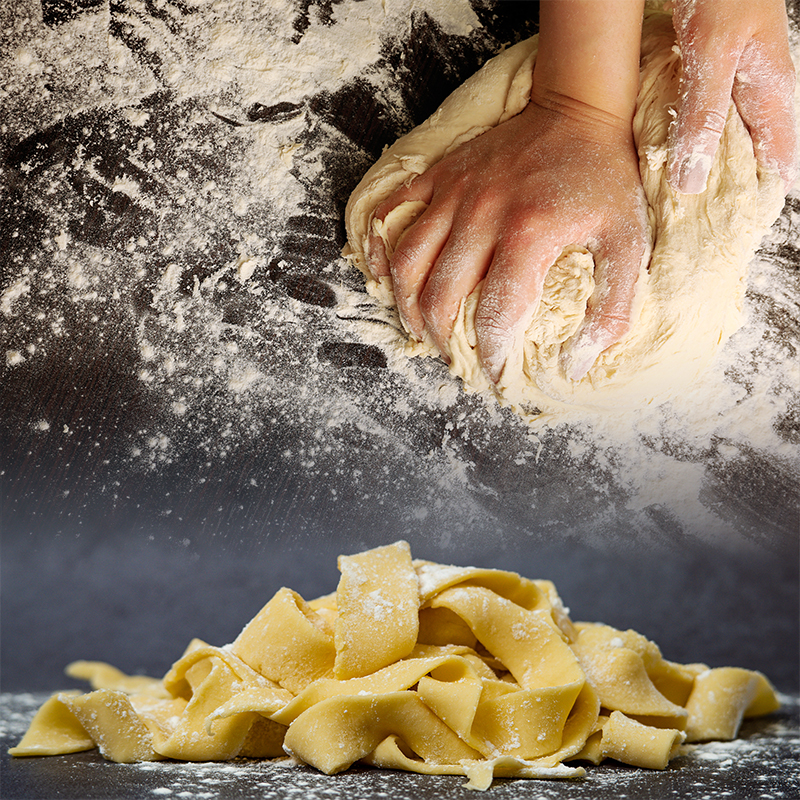
After its rest, turn the dough out onto the lightly floured board. Cut the dough into fist sized balls - keep the ones you're not working with, in the covered bowl.
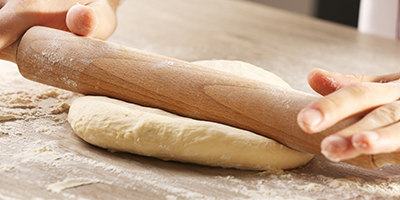
Gently flatten the ball, keep turning it so you effectively work in a circle. Now roll it with the roller, gently, gently - again working in a circle. If its a little sticky - lightly flour the board and the roller as you work. Once the square gets bigger than the size you can handle comfortably, cut it in half and work one at a time.
Aim for about 2mm thickness all over. Dust the surface with flour and cut the shapes you want - try and aim for more or less the same size - they'll cook more evenly.
Dust a generous amount of flour onto a dishcloth and transfer the cut pieces to the cloth; add the pieces as you cut them, making sure you dust on enough flour so they dont stick to each other - the aim here is to get them to dry off a little, but not get them caked in extra flour.
Once all the pieces are cut and waiting - at this stage you have a 'window' of an hour or more if you need it - make sure your sauce and all the bits you need to serve your dish, are done, the table set and your guests are at the table, sipping drinks.
If we're cooking pappardelle or large shapes, we prefer to cook it in a large, shallowish pot on a fast burner. The traditional high sided pasta pot is ideal for spaghetti - not so much for sheet pasta.
Salt the cooking water until it is as salty as the ocean and heat it until it is at a rolling boil. Slide as many bits of pasta in at a time that will move around freely - they must not be crowded. The conventional wisdom says that when they float, they're cooked. With larger shapes it is not always true - we find cooking times vary tremendously. Sometimes the shapes cook in 4-5 minutes; other times it is 6-8 minutes. At 4 minutes, take out a piece, rinse it under cold water and taste it. For the first batch you may need to taste a couple of times.
Remove the cooked pieces with a slotted spoon and set them in the collander to drain for a few minutes, then transfer them to the dish with the topping or sauce. Meantime, cook off the remaining pasta.
Serve immediately - Rule #1b - guests always wait for pasta; pasta does not wait for guests.
Buon appetito!